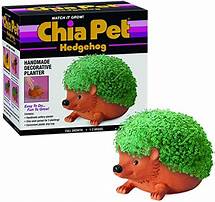
Do You Trim Chia Pets?
Chia pets are a fun and easy way to add a touch of greenery to your home. But did you know that you can also trim them to create different shapes and designs? Here's a step-by-step guide on how to trim a chia pet:
Materials:
1. Chia pet 2. Scissors 3. Bowl of water 4. Paper towels
Instructions:
- Prepare your chia pet. Water the chia pet thoroughly and let it sit for 15 minutes. This will help to soften the sprouts and make them easier to trim.
- Trim the sides. Use scissors to carefully trim the sides of the chia pet. Start by cutting the sprouts that are sticking out the most. Work your way around the chia pet, cutting the sprouts until you have a smooth, even surface.
- Trim the top. Once you have trimmed the sides of the chia pet, you can trim the top. Use scissors to carefully cut the sprouts that are sticking out the top. Again, work your way around the chia pet, cutting the sprouts until you have a smooth, even surface.
- Shape the chia pet. Once you have trimmed the sides and top of the chia pet, you can start to shape it. You can use scissors to create different shapes, such as a heart, a star, or a circle. Be creative and have fun!
- Mist the chia pet. Once you are finished trimming and shaping the chia pet, mist it with water. This will help to keep the sprouts hydrated and looking their best.
Here are some additional tips for trimming chia pets:
1. Use sharp scissors. This will help to make clean, even cuts.
2. Be patient. It takes time to trim a chia pet. Don't rush it, or you may end up with a lopsided or uneven shape.
3. Have fun! Trimming chia pets is a great way to express your creativity. So let loose and have some fun with it.
Declaration: All article resources on this website, unless otherwise specified or labeled, are collected from online resources. If the content on this website infringes on the legitimate rights and interests of the original author, you can contact this website to delete it.